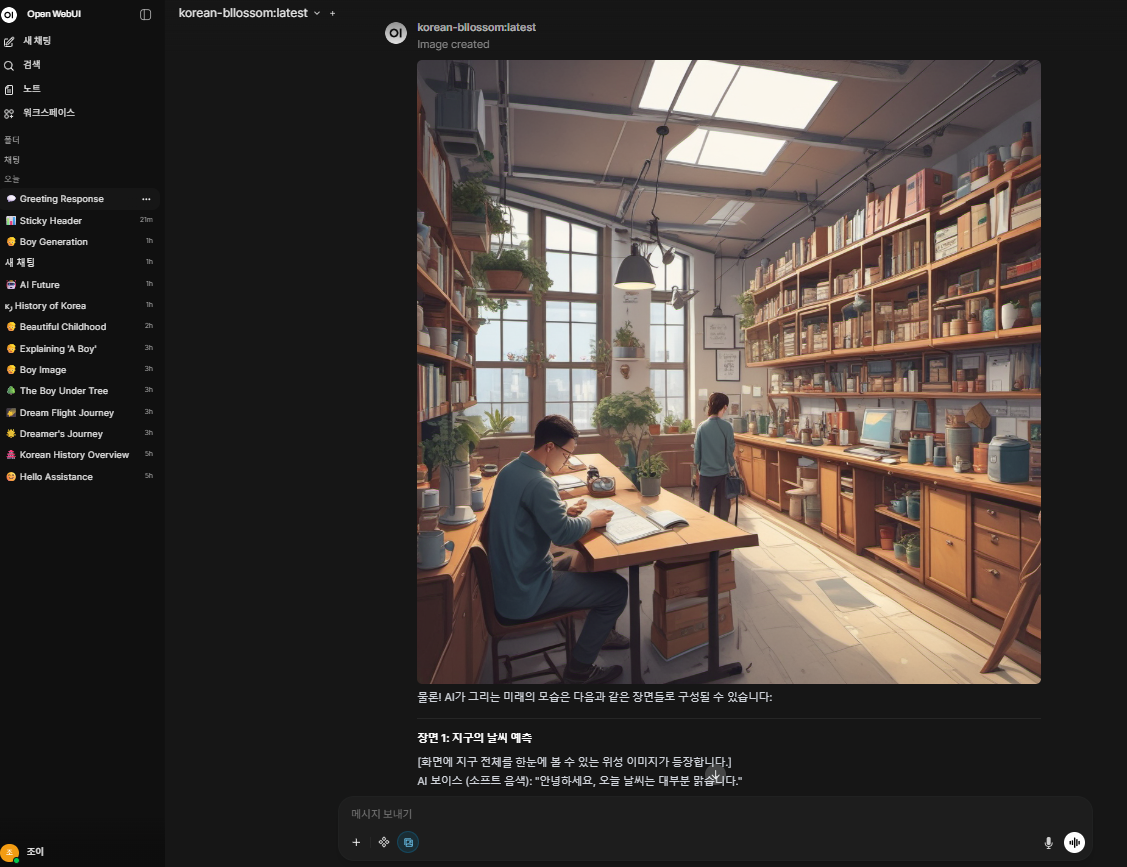
Run OpenWebUI + ComfyUI
Combine Open WebUI + Ollama + ComfyUI in a single GPU workload to use Korean-language chat and image generation together.
Before You Begin
| Item | Description |
|---|---|
| gcube account | Sign up at gcube.ai |
| Point balance | Billed hourly based on GPU usage time |
Step 1 — Register Workload
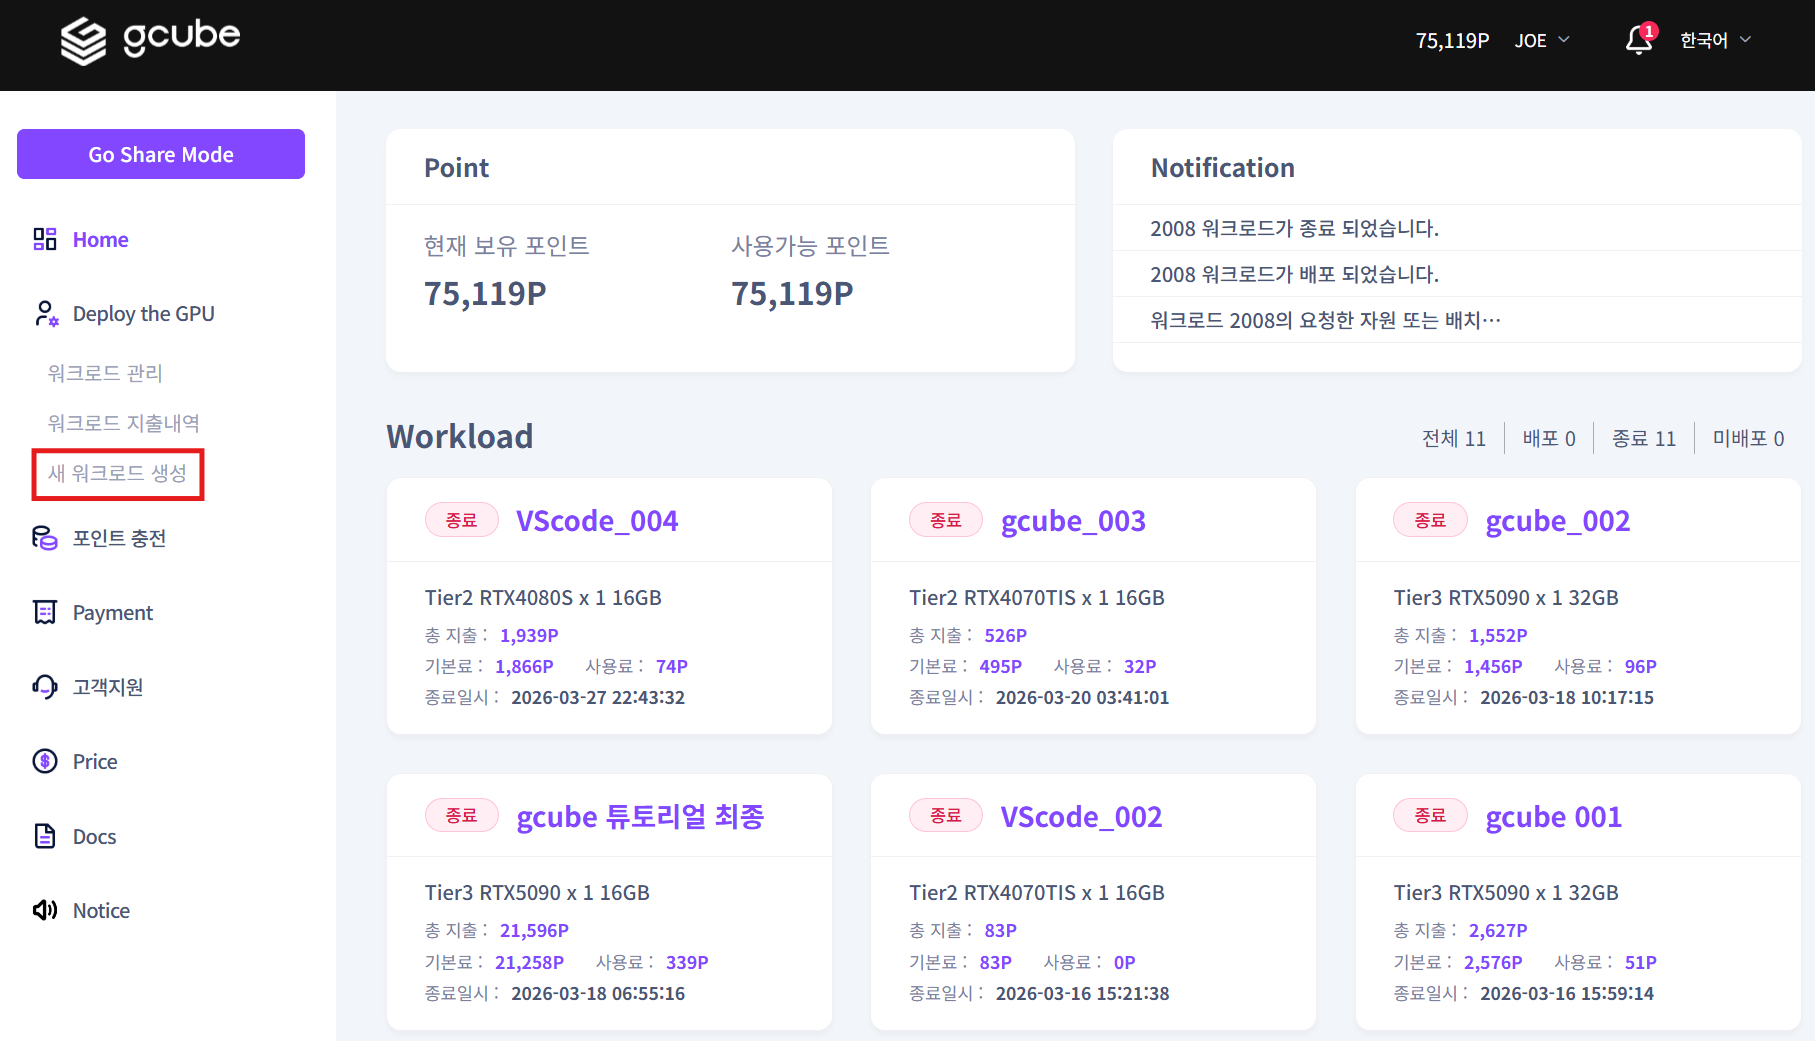
1-1. Register New Workload
Go to the workload page and register a new workload or modify an existing one.
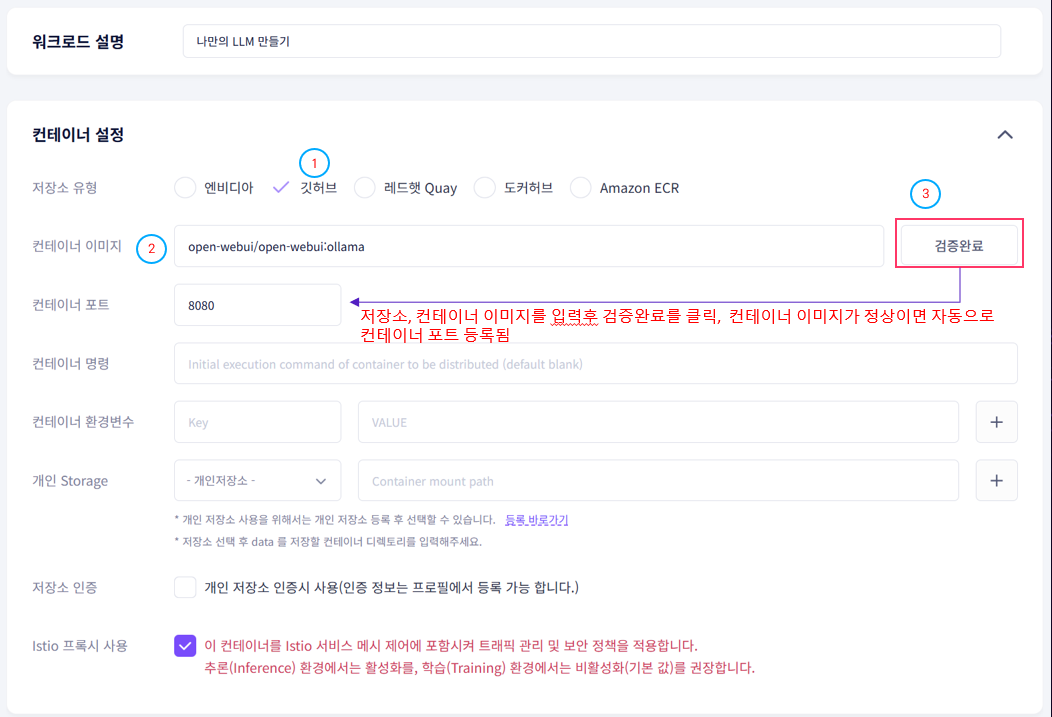
1-2. Container Settings
Enter the following information.
| Item | Value |
|---|---|
| Registry Type | GitHub |
| Container Image | open-webui/open-webui:ollama |
| Container Port | Auto-filled after image validation |
Tip
After entering the registry type and container image, click the Validate button. If the image is valid, the container port will be filled in automatically.
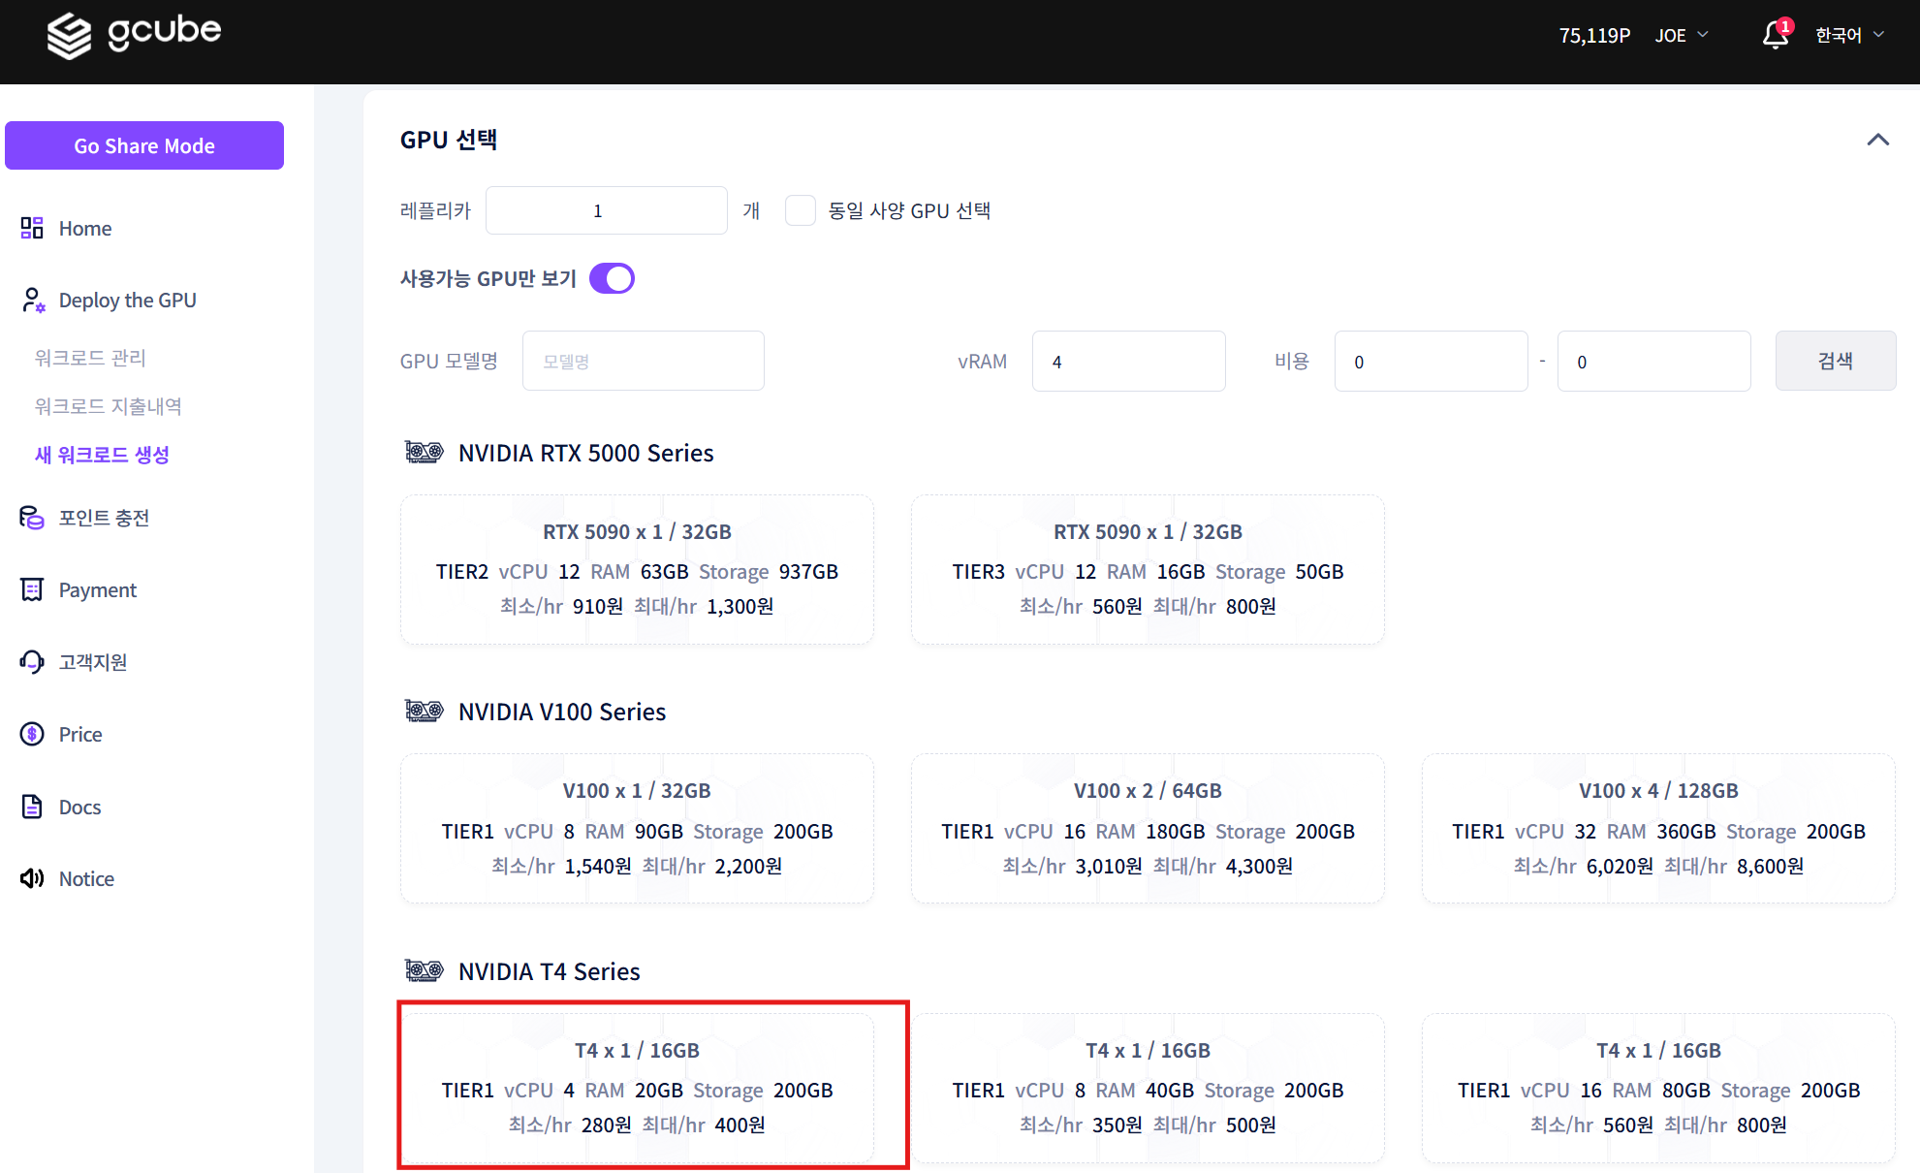
1-3. Select GPU and Register
Select a GPU and complete registration with Manual Deployment.
1-4. Deploy Workload
Click the Deploy button on the workload management screen.
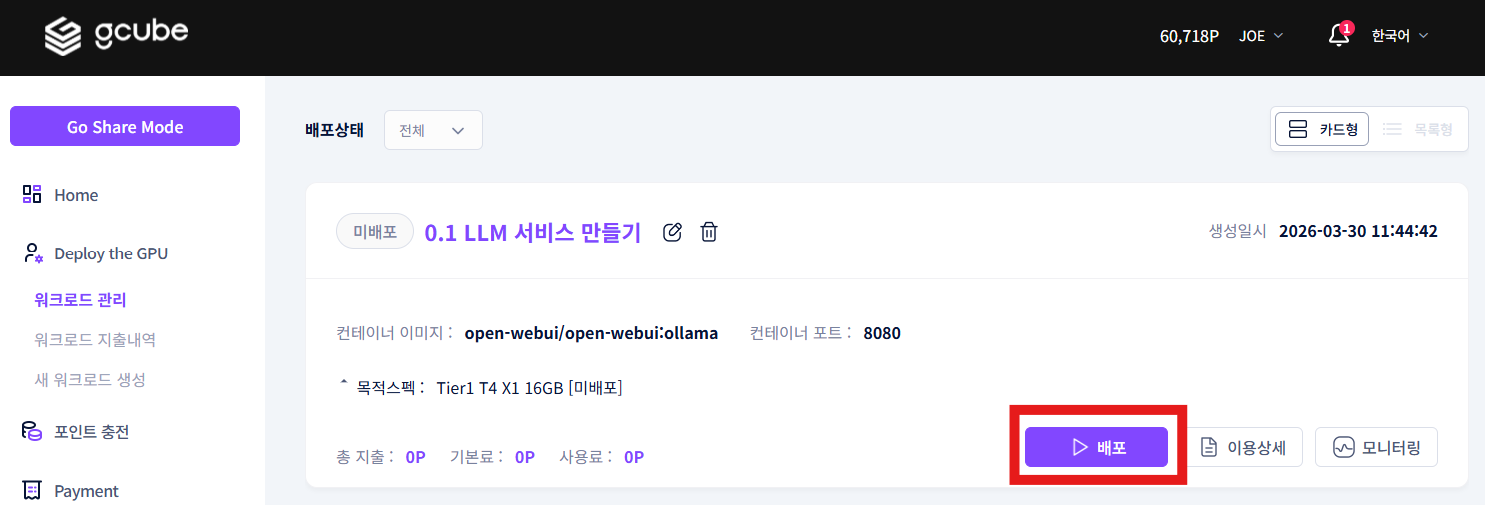
Once deployment starts, you can check the service URL activation and deployment progress.
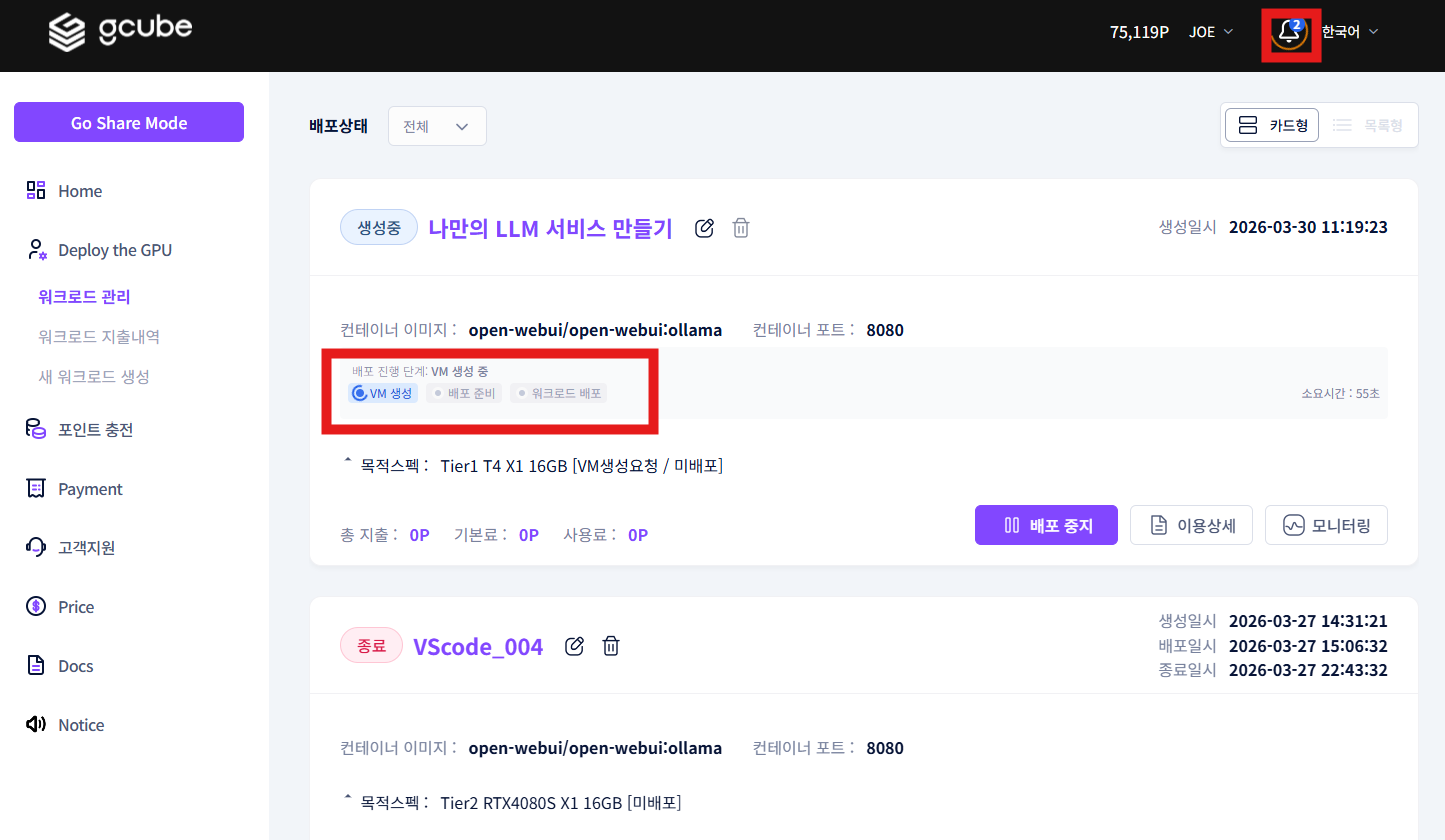
Warning
Deployment may take 5–10 minutes depending on the container image size and network environment. For Tier 1 cloud GPUs, it may take up to 30 minutes.
Step 2 — Access Open WebUI and Create Admin Account
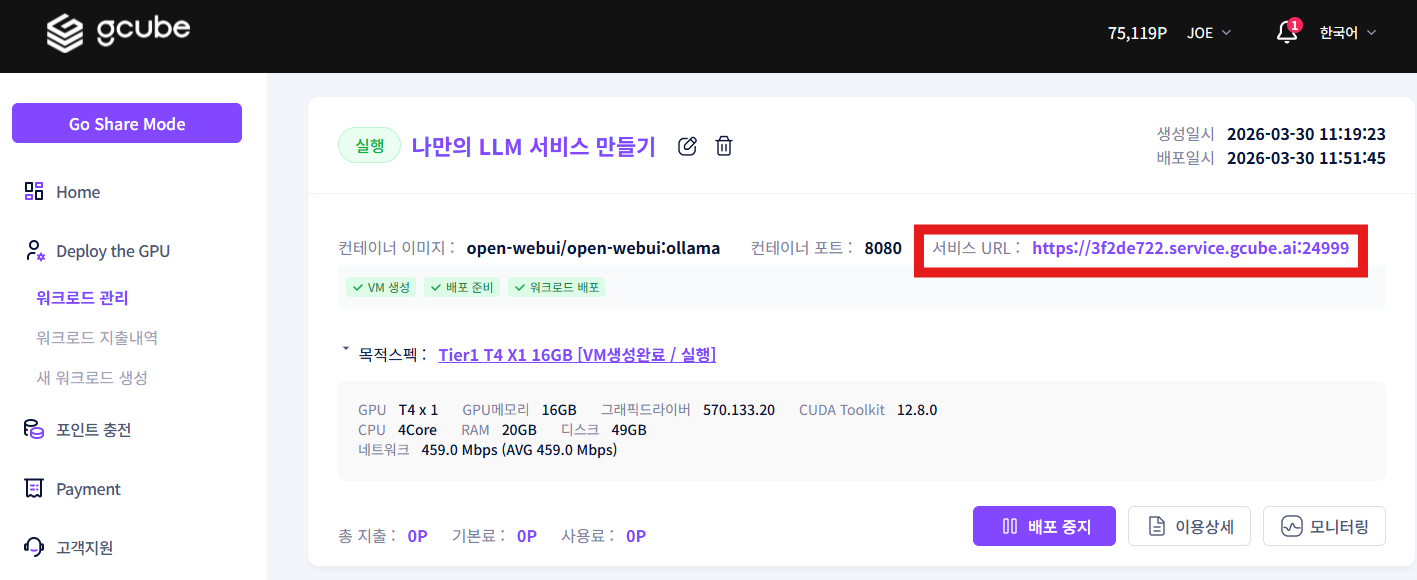
2-1. Access Open WebUI
Click the service URL to access the Open WebUI web page.
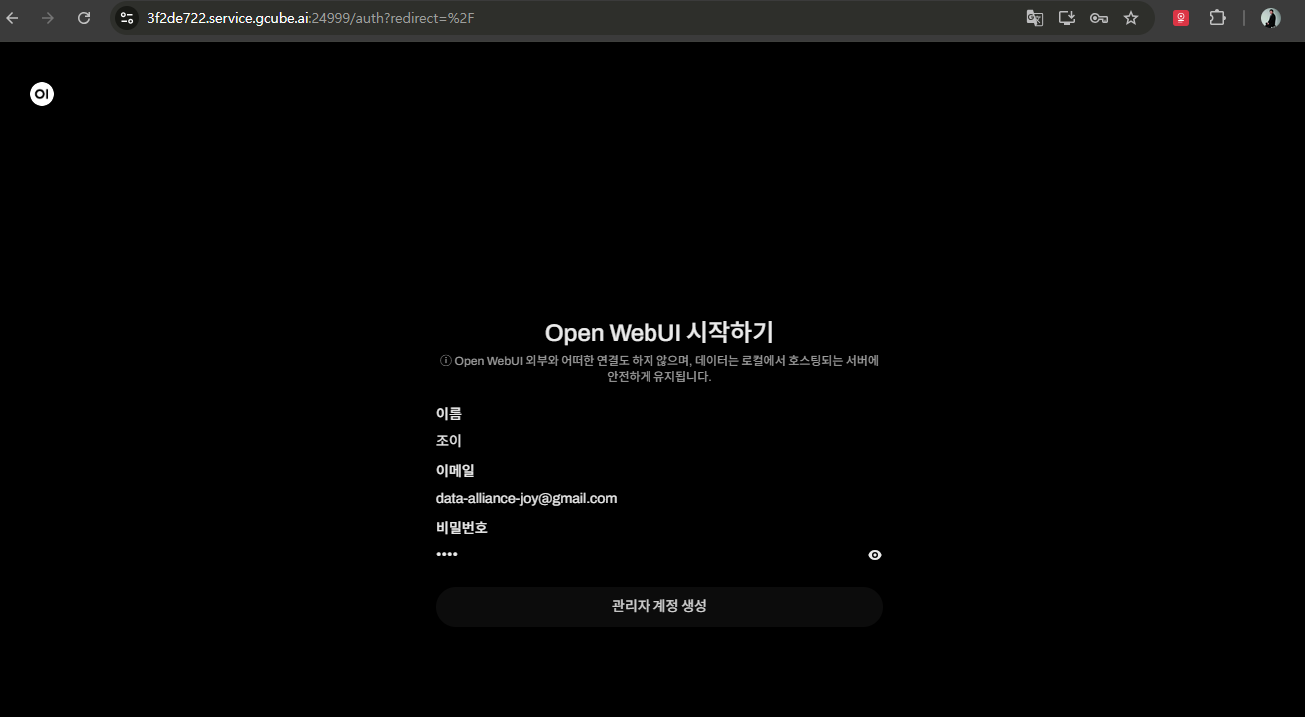
2-2. Create Admin Account
Create an admin account on first access.
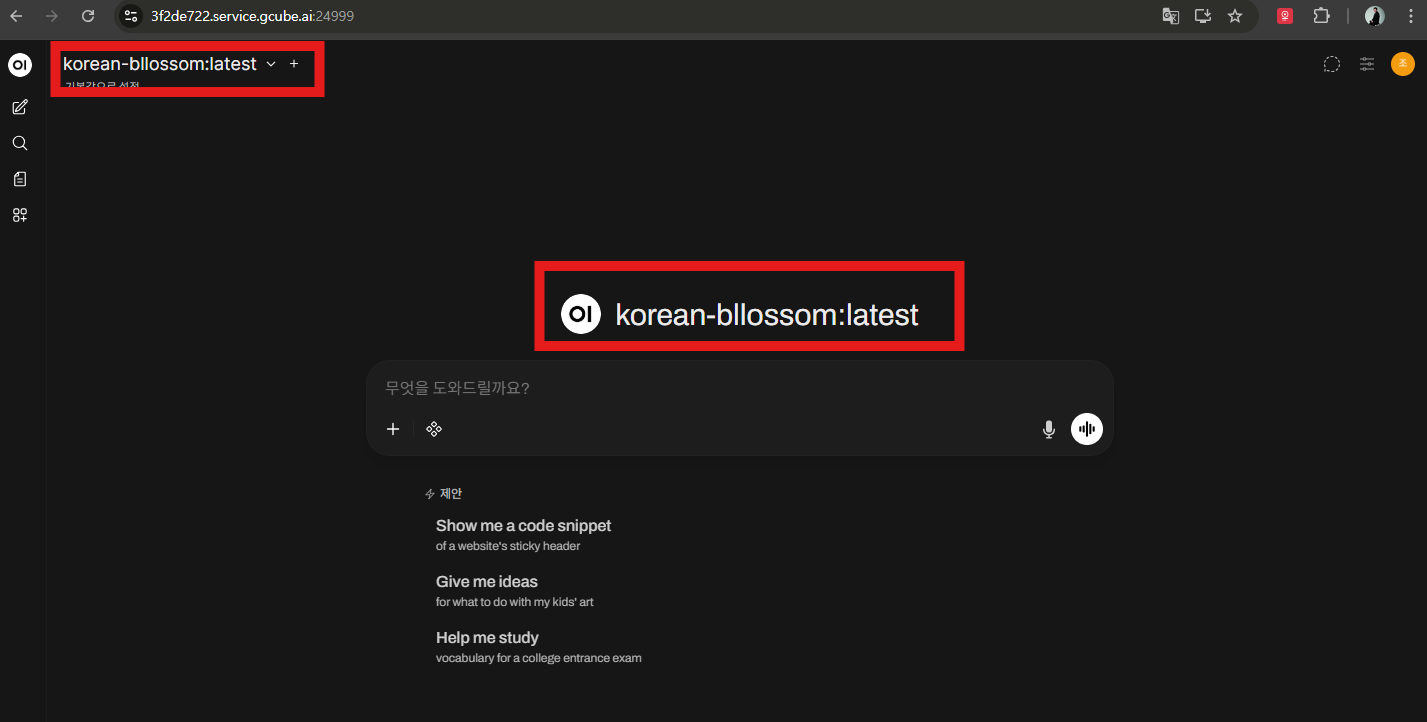
2-3. Check LLM Model
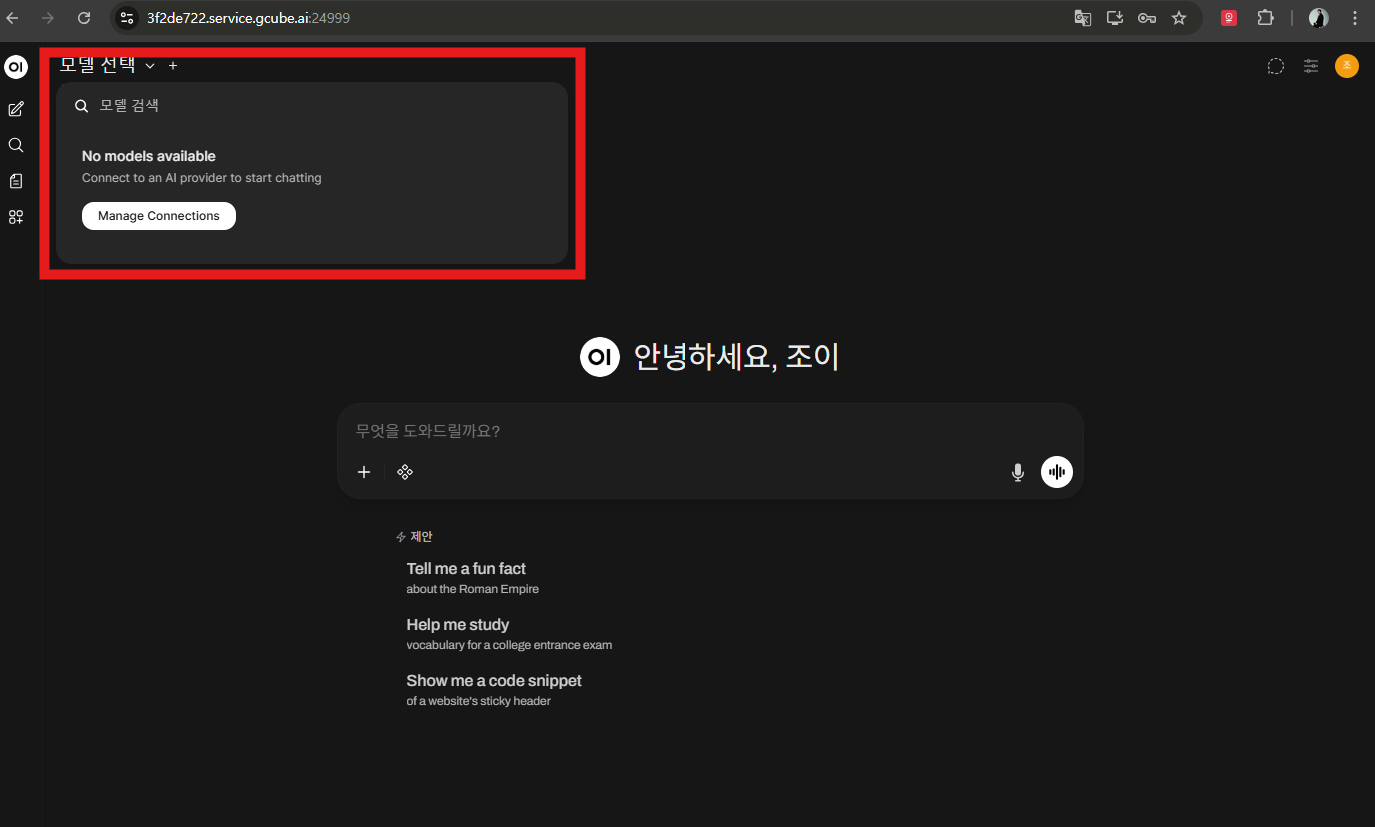
After accessing Open WebUI, you can select an LLM model to use conversational AI. However, since no LLM has been downloaded yet, it cannot be used at this stage.
In the next step, you will install the Bllossom model based on Llama-3, which has strong Korean language capabilities.
Step 3 — Install Korean LLM (Bllossom)
3-1. Access Workload Terminal
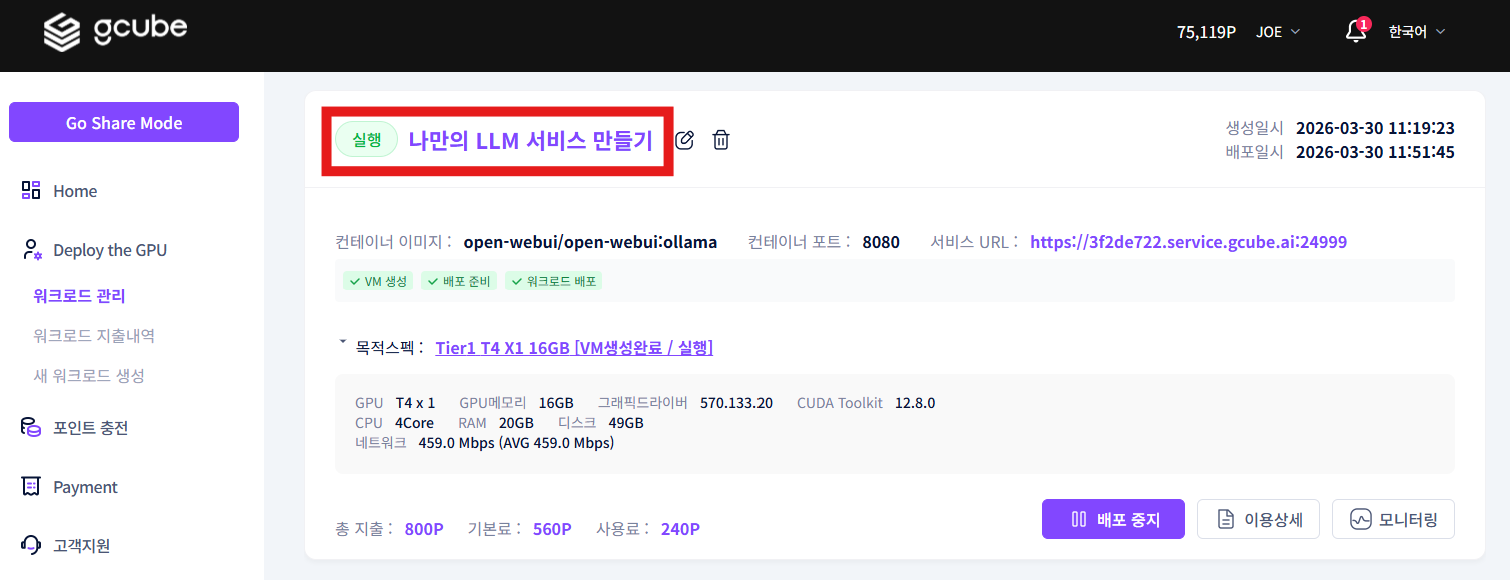
Click the running workload title to go to the workload info screen.
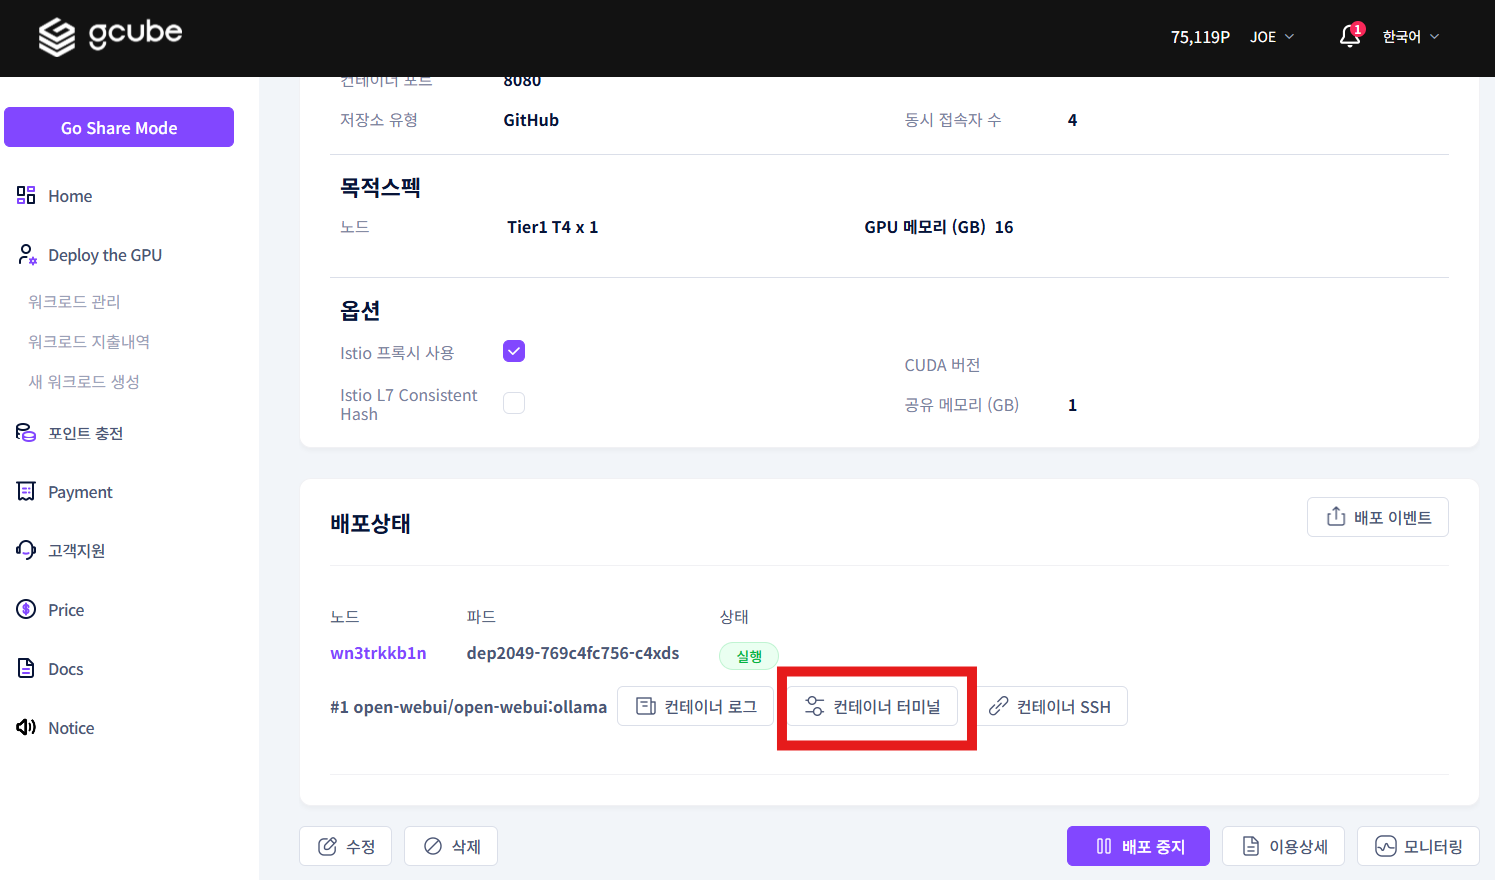
Click the Container Terminal button to open the terminal.
3-2. Download Bllossom GGUF Model
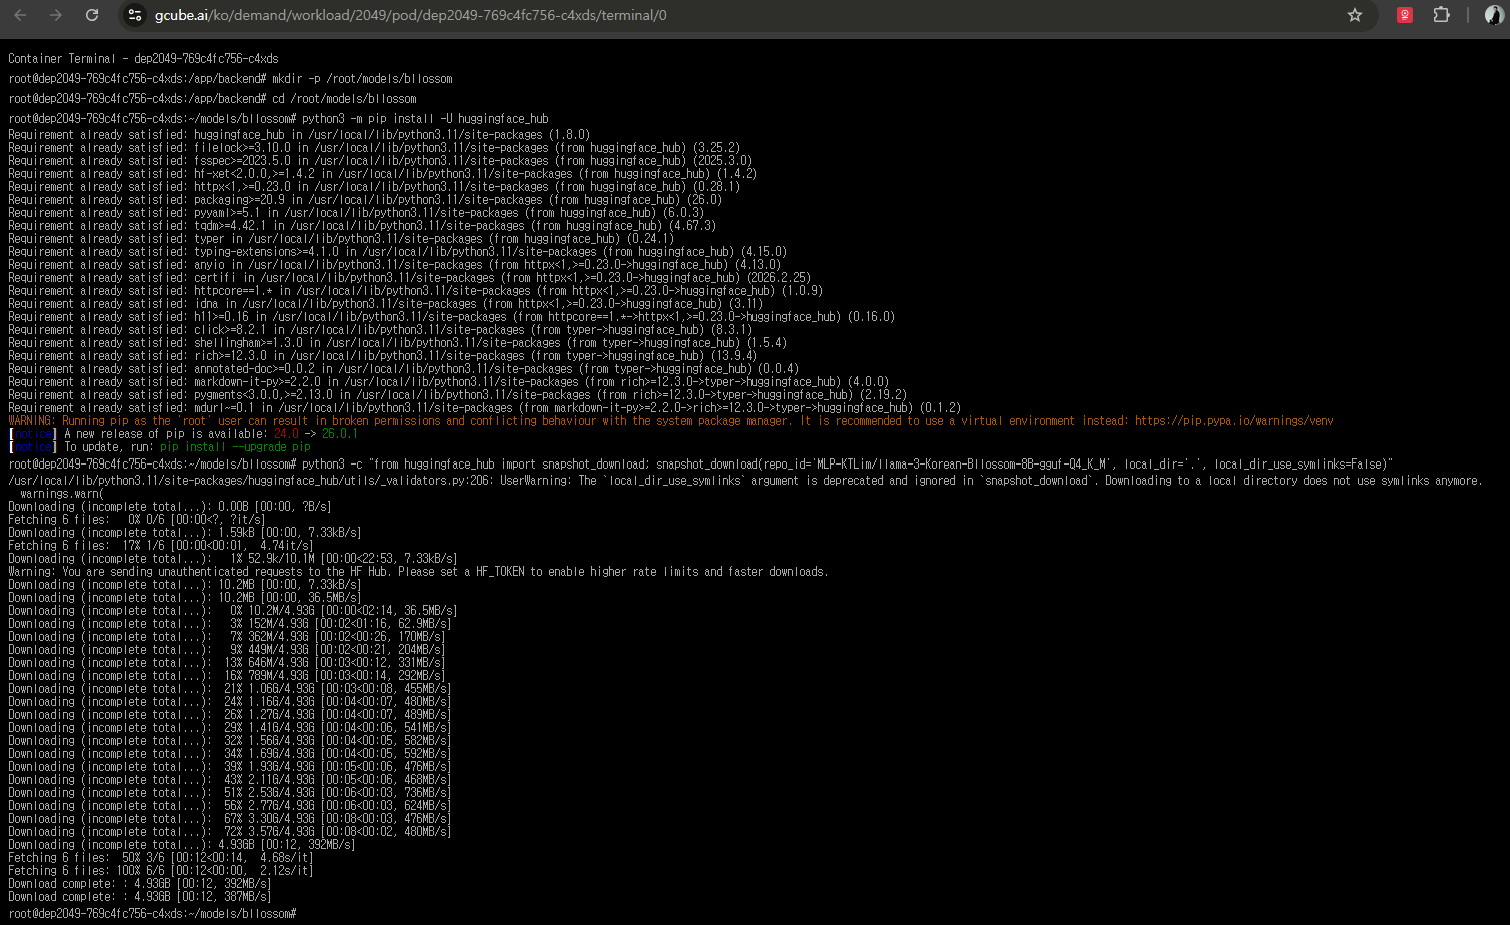
Enter the following commands in the terminal in order.
# Create Bllossom GGUF download folder
mkdir -p /root/models/bllossom
cd /root/models/bllossom

# Install Hugging Face download tool
python3 -m pip install -U huggingface_hub

# Download GGUF model
python3 -c "from huggingface_hub import snapshot_download; snapshot_download(repo_id='MLP-KTLim/llama-3-Korean-Bllossom-8B-gguf-Q4_K_M', local_dir='.', local_dir_use_symlinks=False)"
3-3. Create Modelfile
cat > /root/models/bllossom/Modelfile <<'EOF'
FROM ./llama-3-Korean-Bllossom-8B-Q4_K_M.gguf

SYSTEM """
You are a helpful AI assistant.
Please answer the user's questions kindly and accurately.
The default response language is Korean.
"""
EOF
3-4. Register and Run Model in Ollama
# Register model in Ollama
cd /root/models/bllossom
ollama create korean-bllossom -f Modelfile

# Run
ollama run korean-bllossom
Once registration is complete, you can use the Bllossom model for Korean conversational AI in Open WebUI.
Step 4 — Install ComfyUI and Download Image Generation Model
4-1. Install ComfyUI
Enter the following commands in the gcube workload terminal in order.
# Install system packages
apt update && apt install -y git python3-venv python3-pip

# Create ComfyUI folder
mkdir -p /comfyui
cd /comfyui

# Download source
git clone https://github.com/comfy-org/ComfyUI.git
cd /comfyui/ComfyUI

# Create and activate virtual environment
python3 -m venv .venv
. .venv/bin/activate

# Upgrade pip
pip install -U pip

# Install PyTorch for NVIDIA (cu118)
pip install torch torchvision torchaudio --index-url https://download.pytorch.org/whl/cu118

# Install ComfyUI dependencies
pip install -r requirements.txt

# Run in background
nohup python3 main.py --listen 0.0.0.0 > /comfyui/comfyui.log 2>&1 &

# Check logs
tail -f /comfyui/comfyui.log
4-2. Download ByteDance/SDXL-Lightning Model
# Navigate to ComfyUI folder
cd /comfyui/ComfyUI

# Activate virtual environment
[ -f .venv/bin/activate ] && . .venv/bin/activate

# Create checkpoints folder
mkdir -p models/checkpoints

# Install download tools
python3 -m pip install -U pip huggingface_hub hf_xet

# Download SDXL-Lightning 4step model
HF_XET_HIGH_PERFORMANCE=1 hf download ByteDance/SDXL-Lightning sdxl_lightning_4step.safetensors --local-dir ./models/checkpoints
Step 5 — Configure Open WebUI ↔ ComfyUI Integration
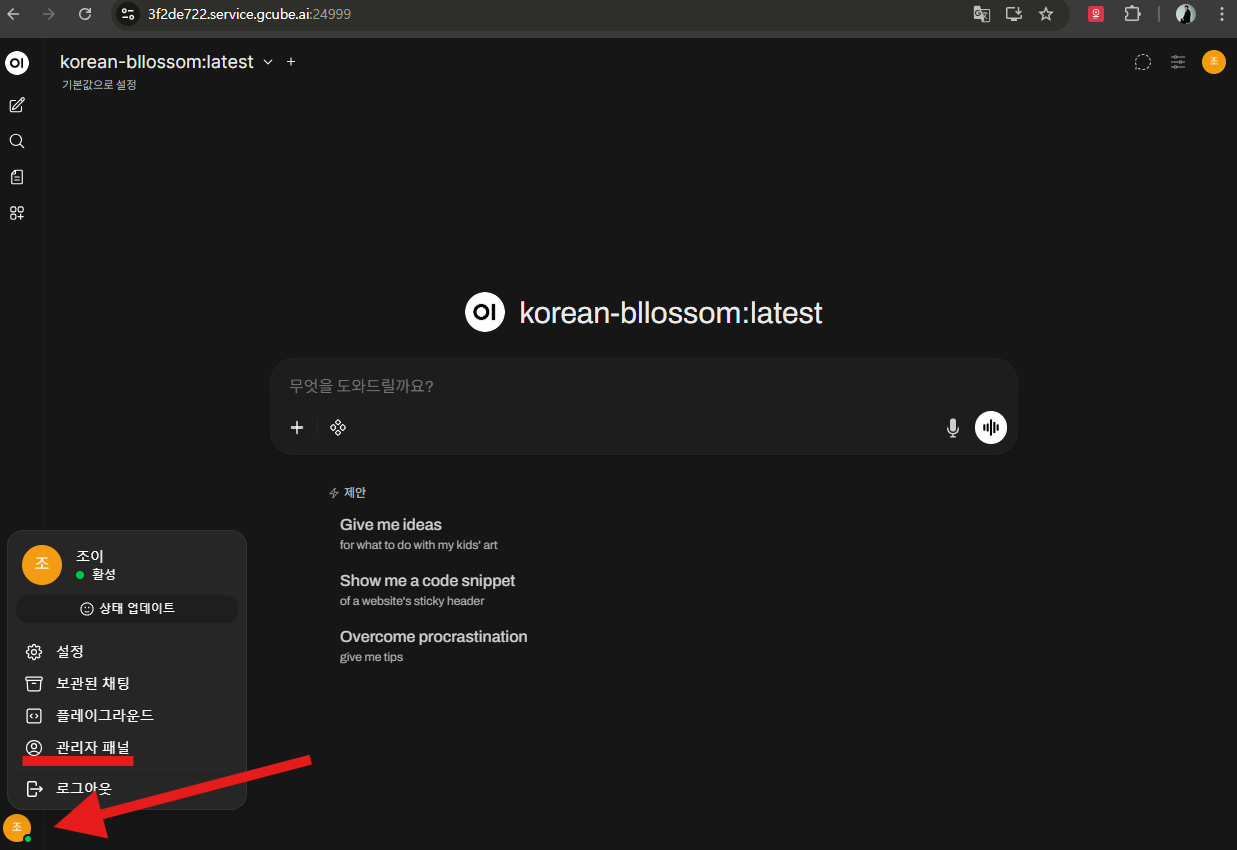
5-1. Access Admin Panel
Access the Open WebUI admin panel.
5-2. Enter Image Generation Settings
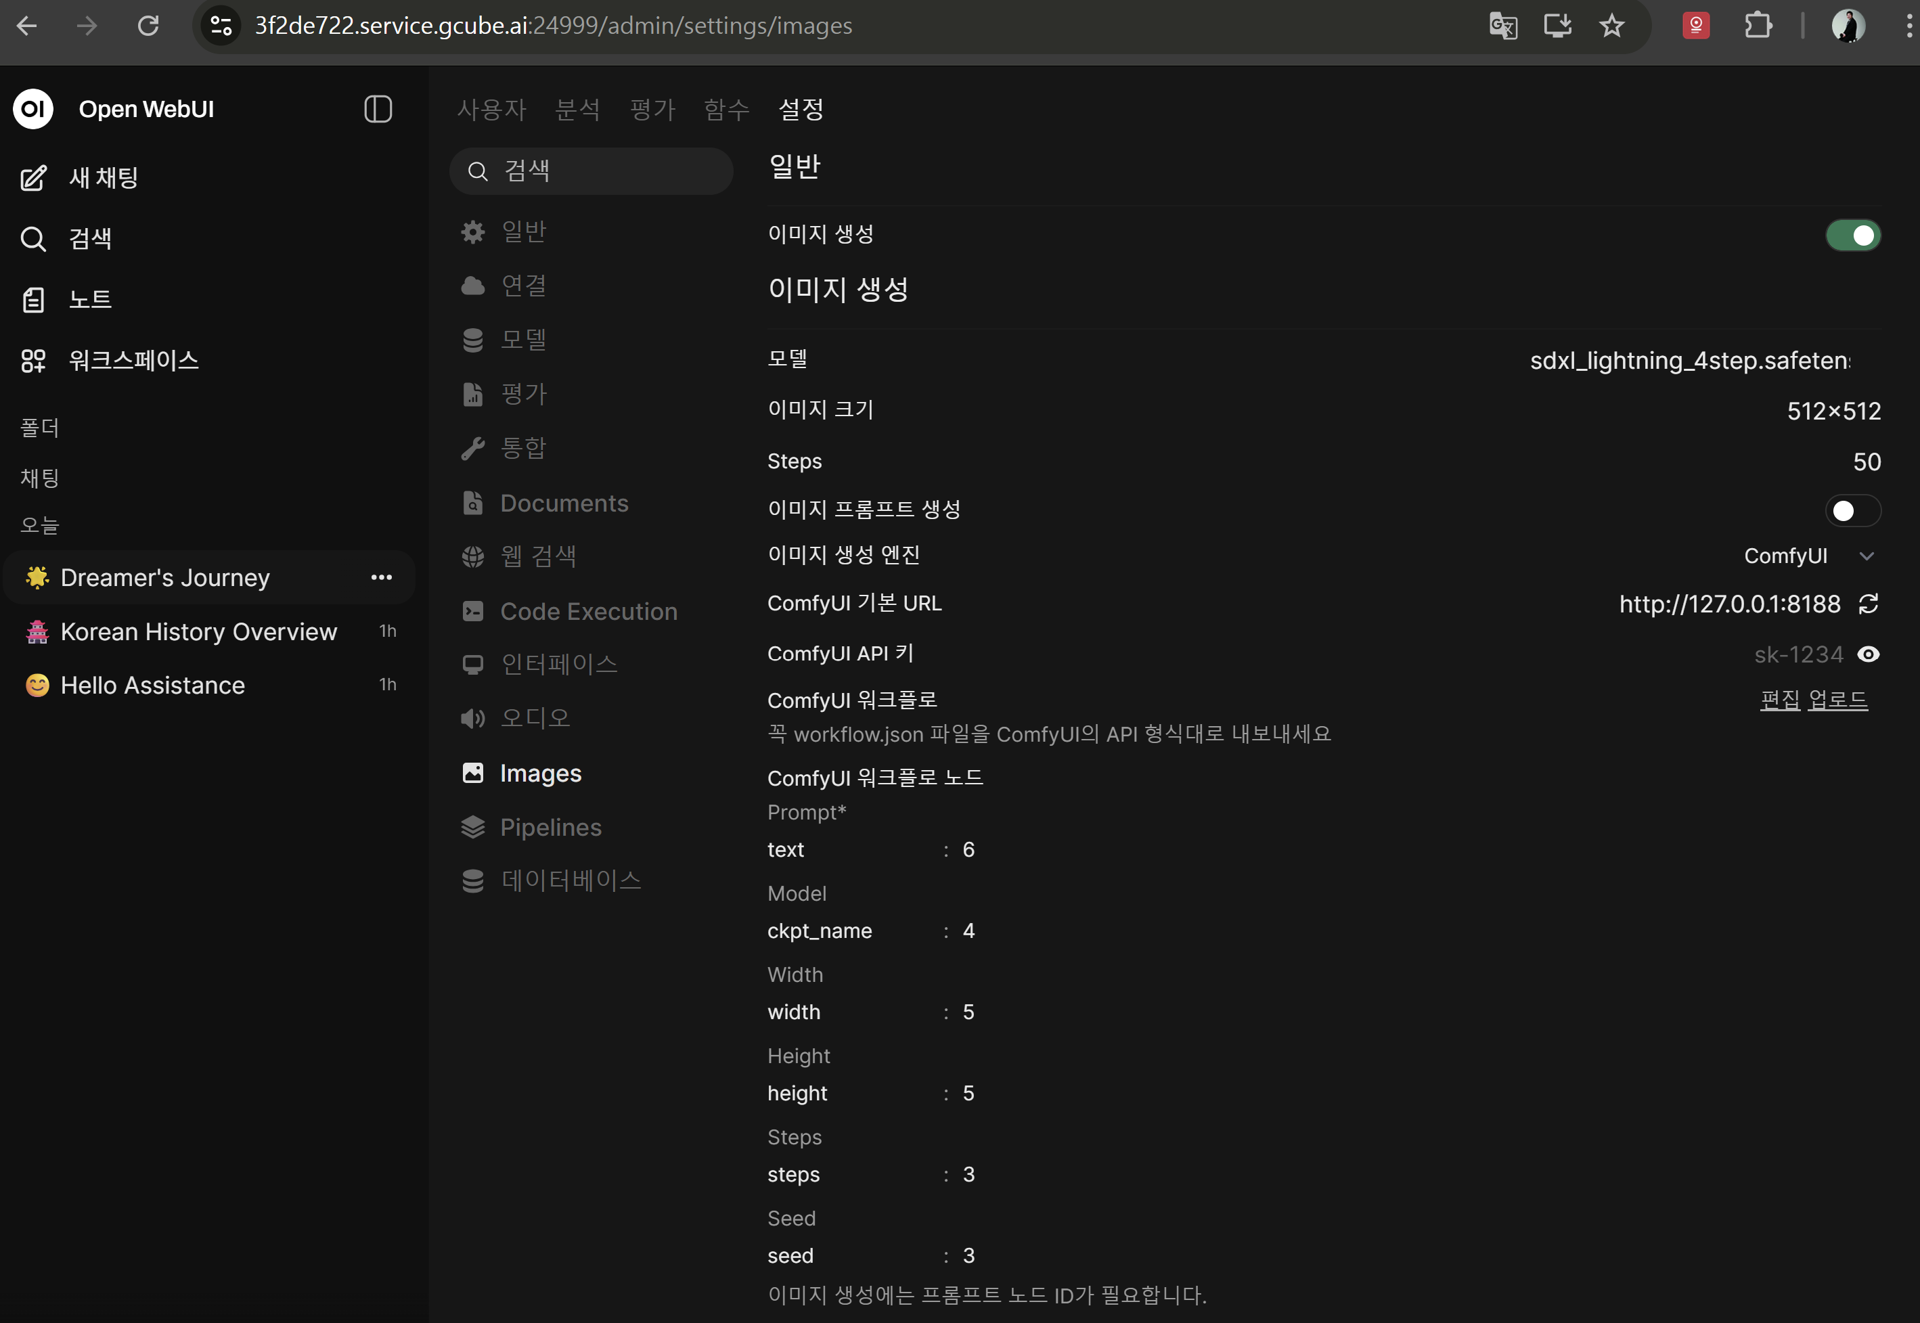
Go to Admin Panel → Settings → Images and enter the following.
| Item | Value |
|---|---|
| Image Generation | Enable (check) |
| Image Generation Engine | ComfyUI |
| ComfyUI Base URL | http://127.0.0.1:8188 |
| Model | sdxl_lightning_4step.safetensors |
| Image Size | 1024 × 1024 |
| Steps | 4 |
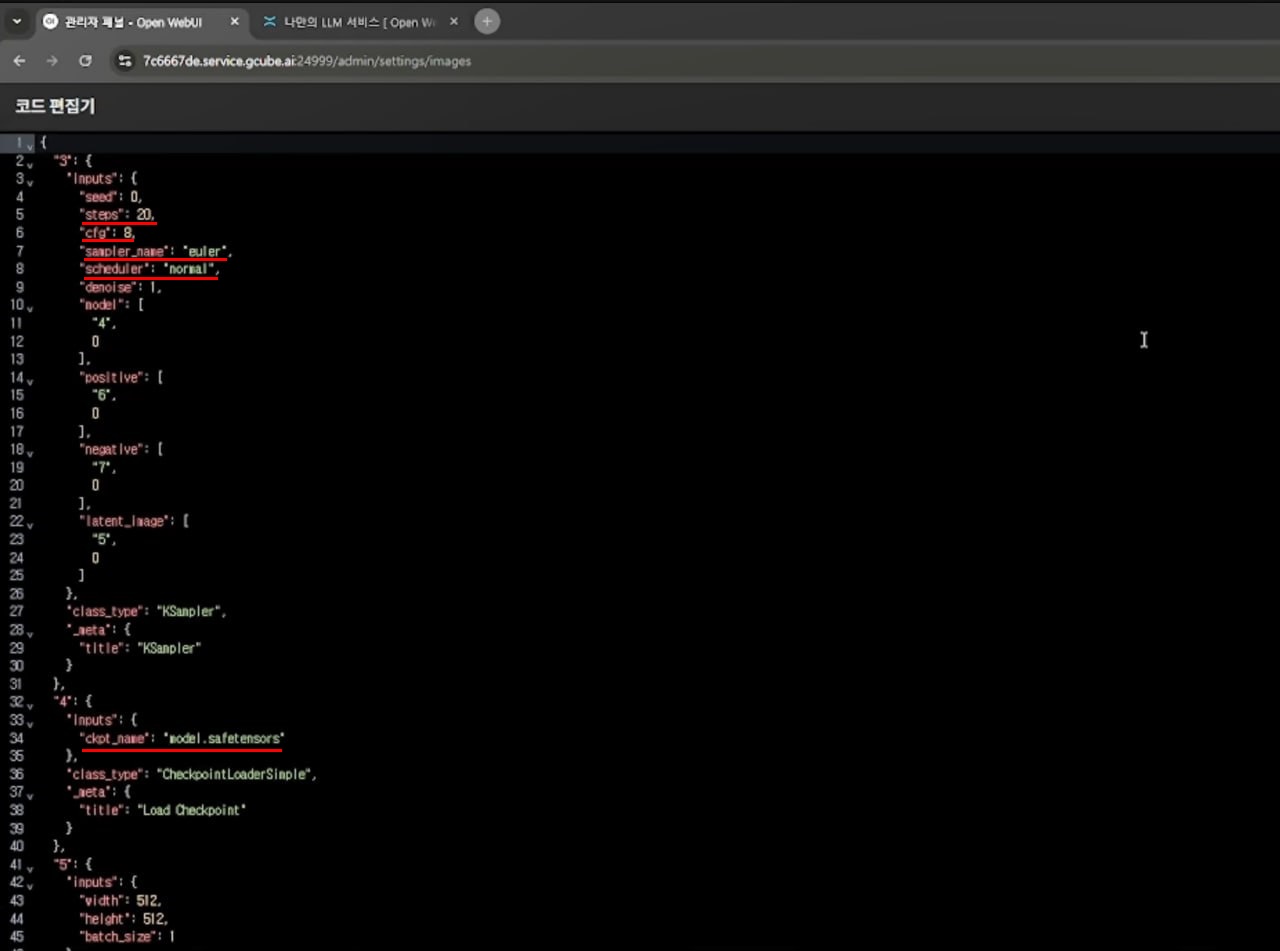
ComfyUI Workflow Settings:
| Item | Value |
|---|---|
| Steps | 4 |
| CFG | 1 |
| Sampler | euler |
| Scheduler | sgm_uniform |
| ckpt_name | sdxl_lightning_4step.safetensors |
ComfyUI Workflow Nodes:
| Node | Value |
|---|---|
| text | 6 |
| ckpt_name | 4 |
| width | 5 |
| height | 5 |
| steps | 3 |
| seed | 3 |
5-3. Text Chat and Image Generation
After configuration, you can use text chat and image generation together in the Open WebUI chat window.