Installing and Running OpenClaw on gcube
This guide explains how to run the Ollama-based gemma4:e4b model and configure the OpenClaw Gateway and Control UI in the gcube workload environment.
Before You Begin
This guide proceeds in the following order:
- Create and deploy workload
- SSH access
- Download Ollama gemma4:e4b model
- Install Node.js and npm
- Install OpenClaw and onboard
- Install plugin dependencies
- Run OpenClaw Gateway
- Approve Telegram Pairing
- Stop and verify OpenClaw process
- Access web dashboard
- Review and edit configuration file
- Configure and use web dashboard
- Troubleshooting
- Security notes
Step 1 — Create and Deploy Workload
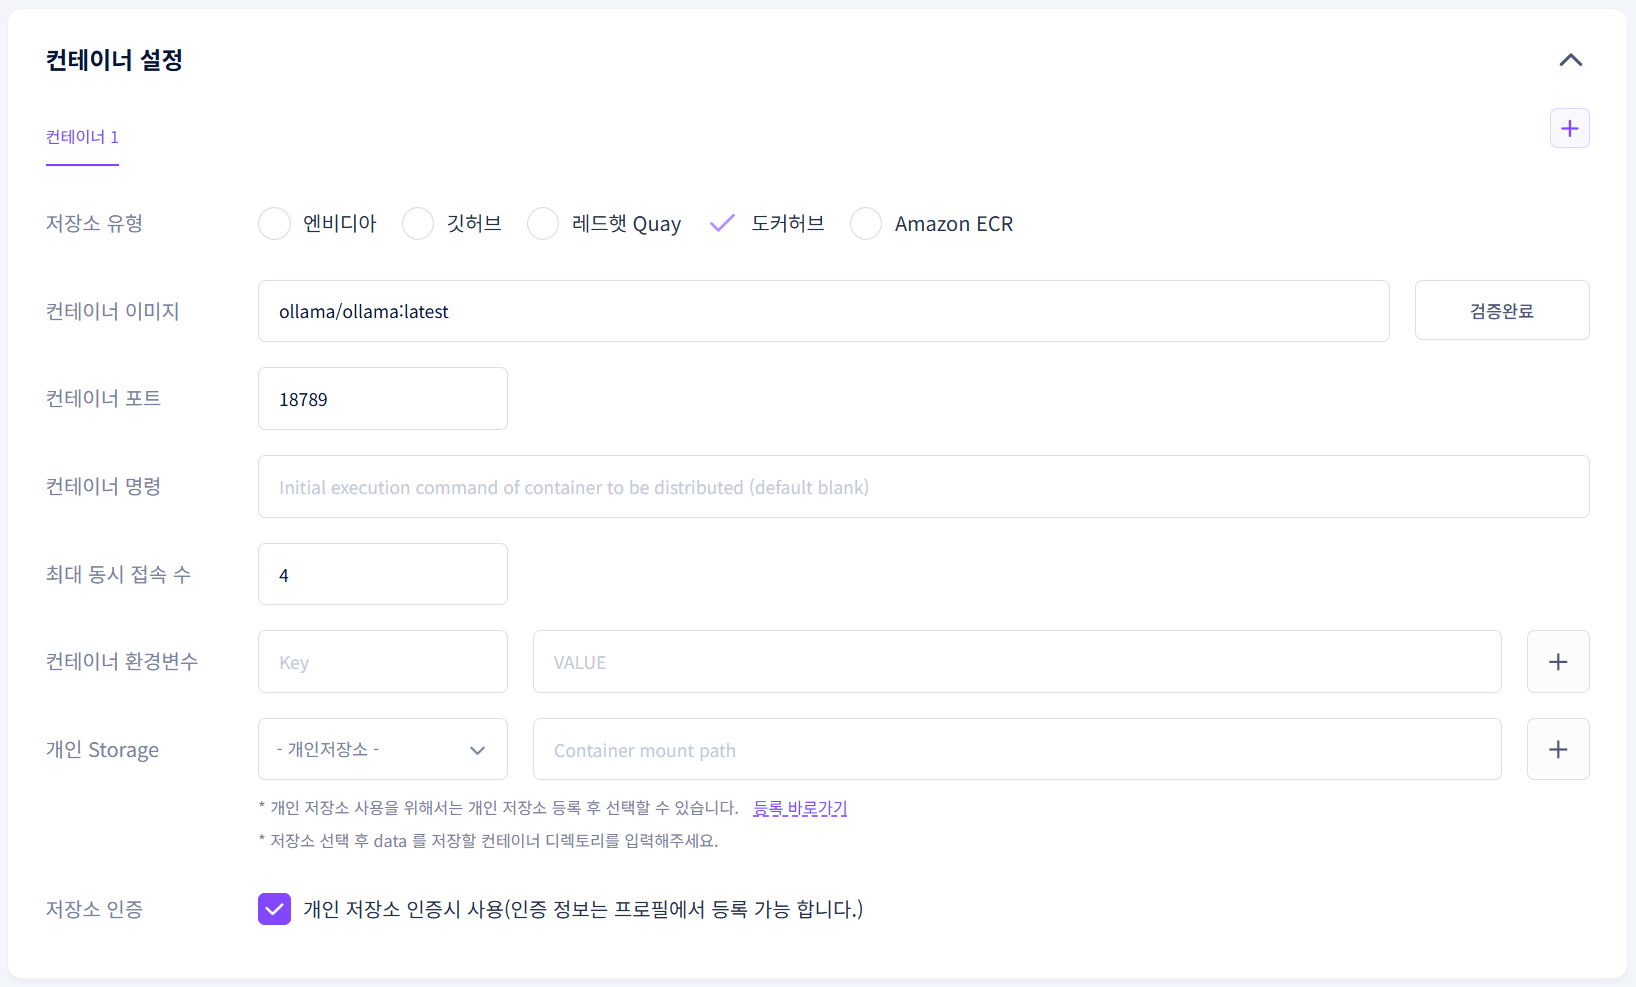
Register a workload with the following settings.
| Item | Value |
|---|---|
| Registry Type | Docker Hub |
| Container Image | ollama/ollama:latest |
| Container Port | 18789 |
| GPU Selection | RTX Series |
| Other Options | Shared Memory 4GB |
Note
Port 18789 is used for OpenClaw Gateway and Control UI access.
Step 2 — SSH Access
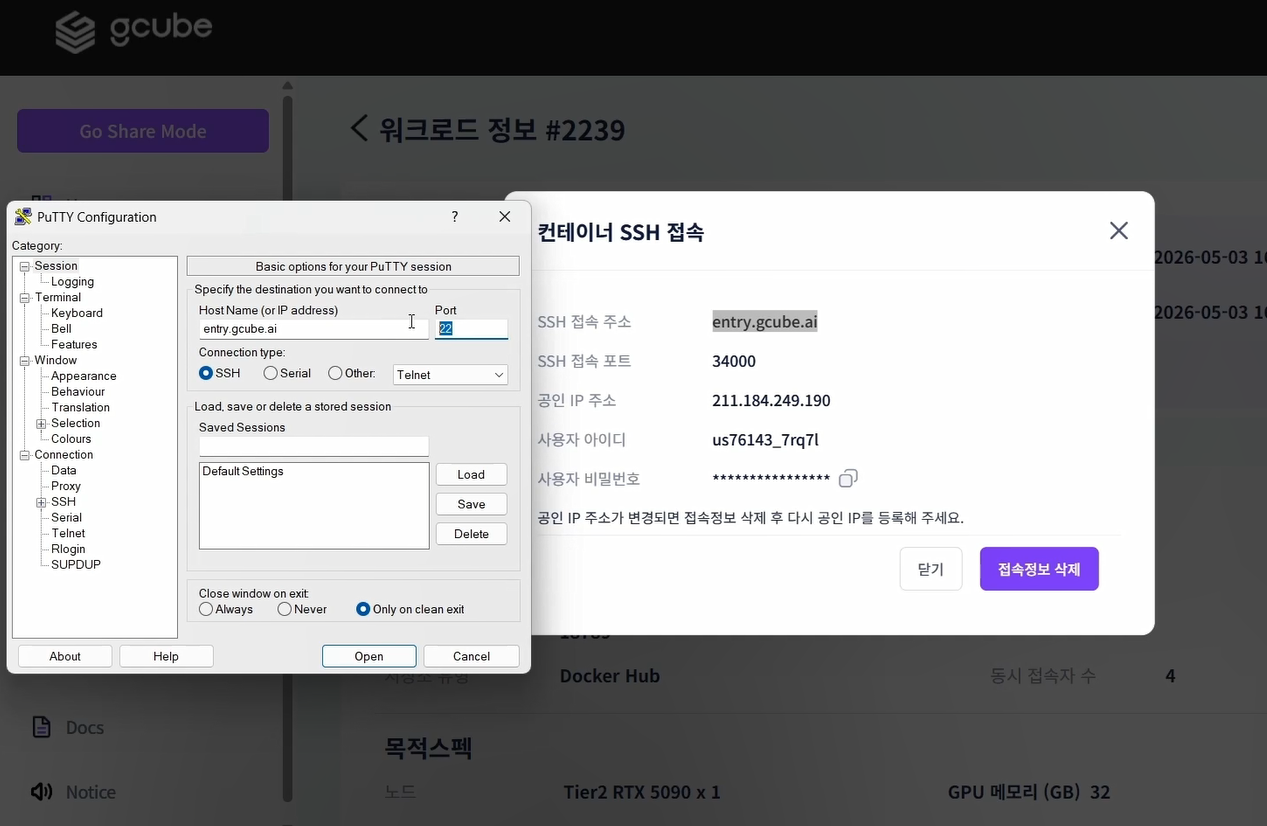
Once the workload is running, check the SSH connection information.
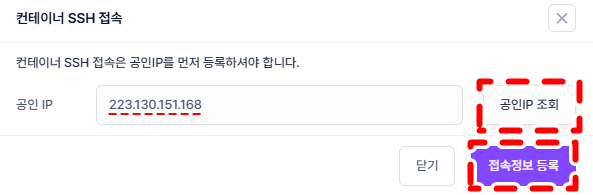
Look up and register your public IP, then connect to the container using the SSH address and port.
Once PuTTY terminal opens successfully, log in with your username and password.
Tip
In PuTTY, you can paste using right-click.
Step 3 — Download Ollama Model
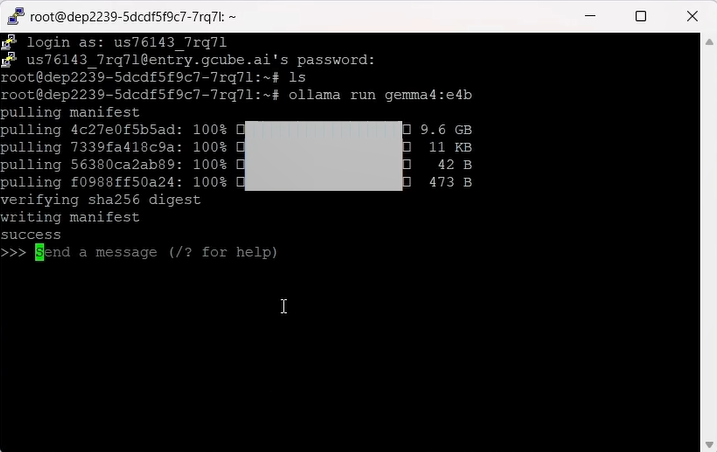
Enter the command below to download and run the gemma4:e4b model.
Tip
In the Ollama chat screen, you can exit with the /bye command.
Step 4 — Install Node.js and npm
Install Node.js, npm, and git for OpenClaw installation.
apt-get update && apt-get install -y curl git
curl -fsSL https://deb.nodesource.com/setup_lts.x | bash -
apt-get install -y nodejs
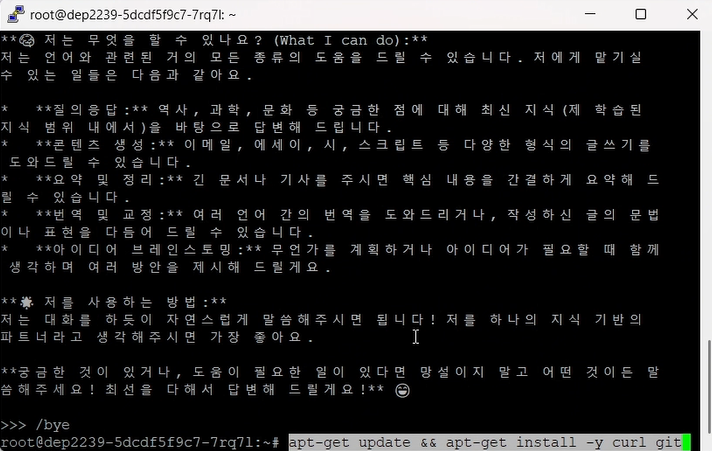
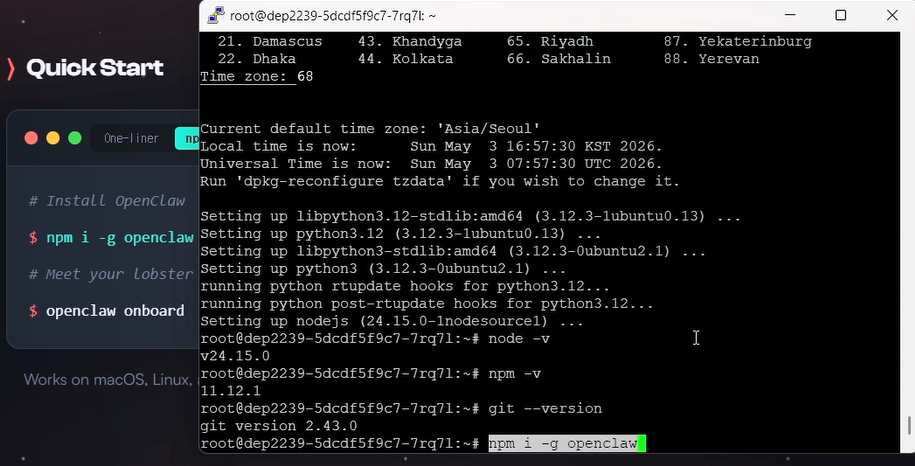
After installation, verify everything is installed correctly.
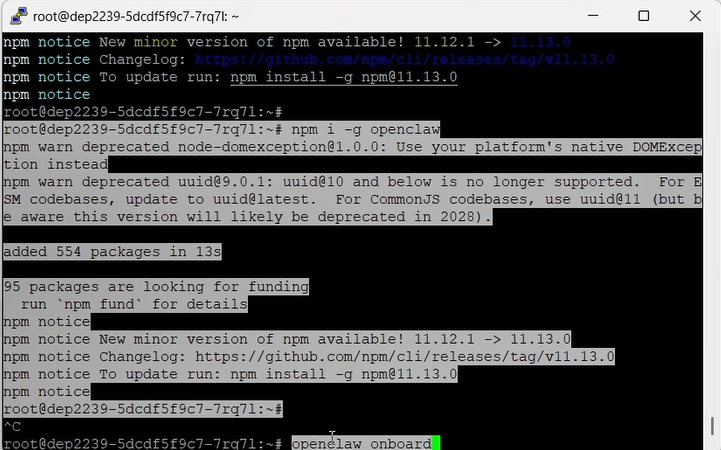
Step 5 — Install OpenClaw and Onboard
Step 6 — Install Plugin Dependencies
If you see a plugin installation error during openclaw onboard, install the required dependencies with the commands below, then run onboard again.
npm i -g @larksuiteoapi/node-sdk nostr-tools
npm i -g @slack/web-api
npm i -g @whiskeysockets/baileys
Warning
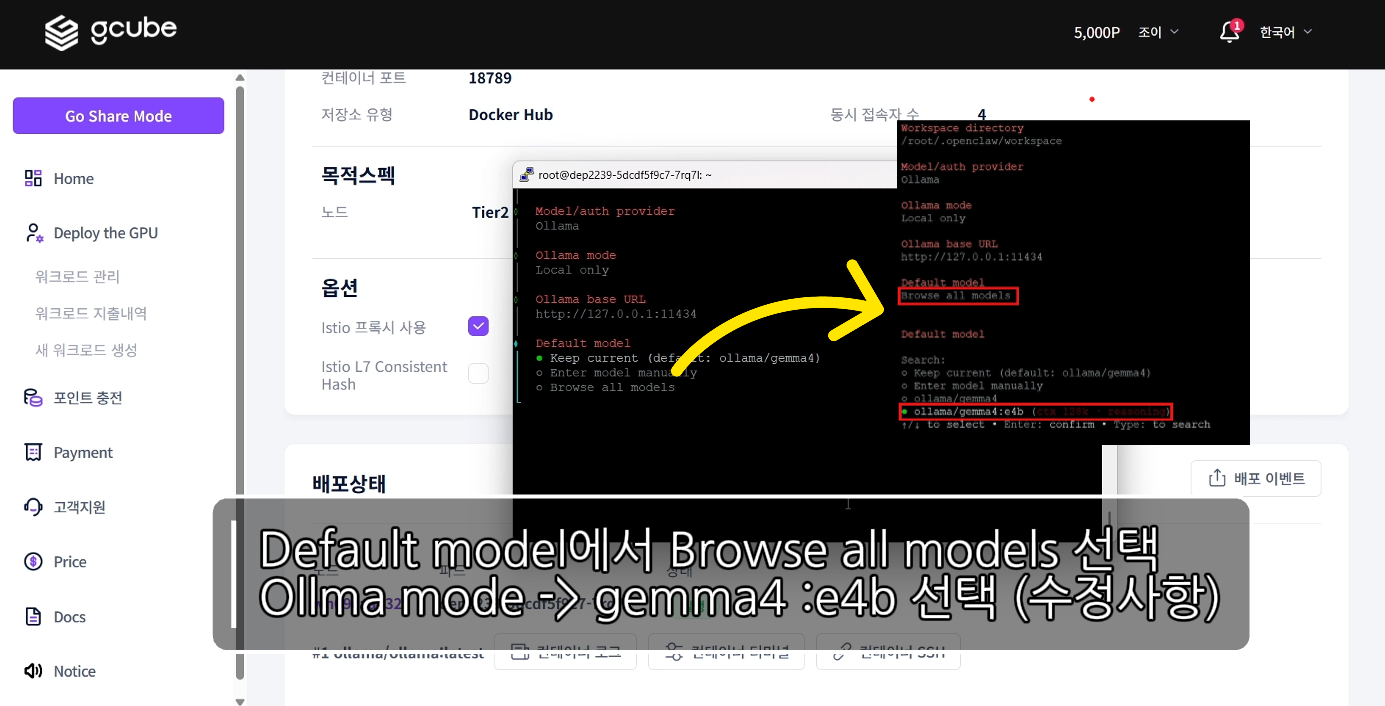
During onboarding, make sure to select the exact gemma4:e4b model under default model.
Step 7 — Run OpenClaw Gateway
Once onboarding is complete, run the Gateway.
Step 8 — Approve Telegram Pairing
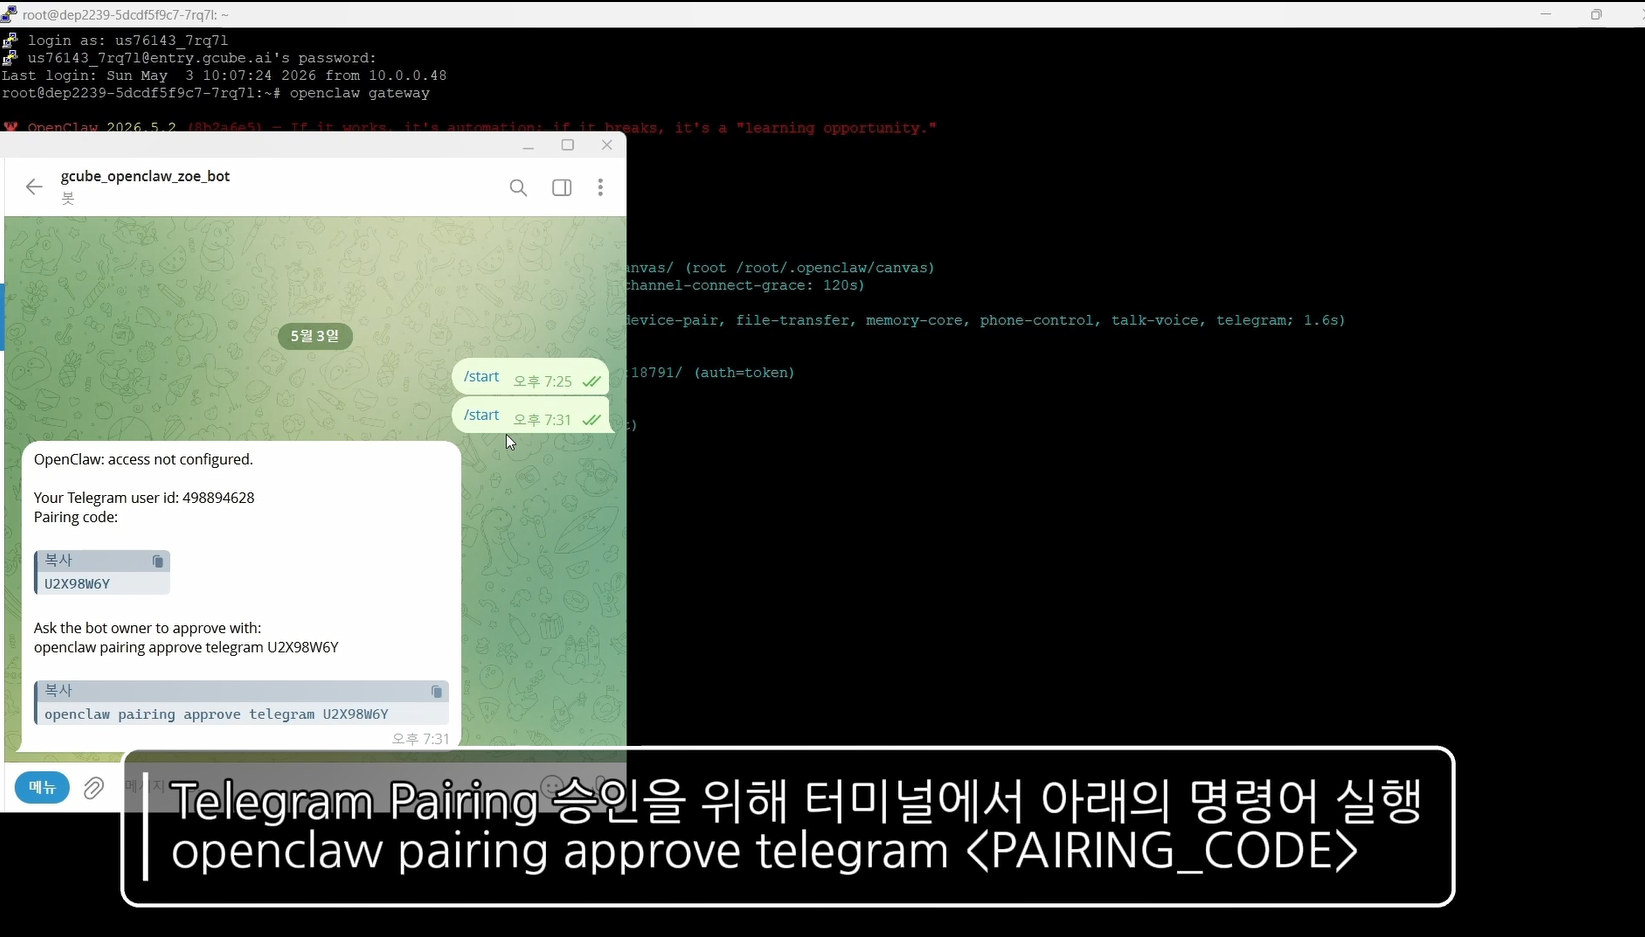
When OpenClaw Gateway is running, a Telegram connection request will appear. Use the Pairing Code from Telegram to run the approval command.
Warning
Keep the Pairing Code confidential and do not expose it externally.
Step 9 — Stop and Verify OpenClaw Process
If you need to restart the Gateway, stop the existing process first, then restart.
Step 10 — Access Web Dashboard
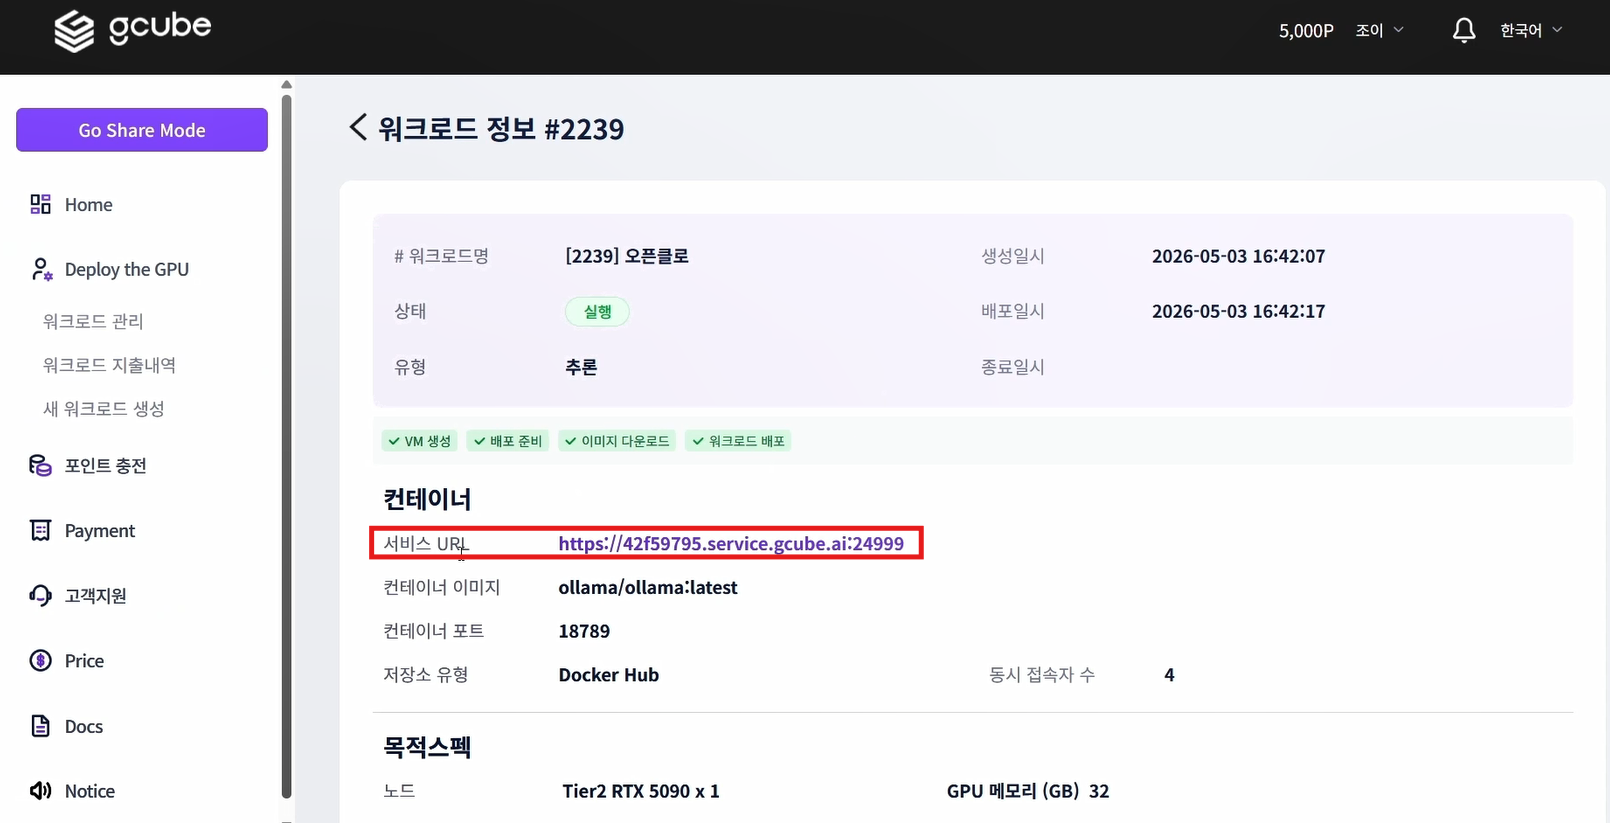
Access the OpenClaw Control UI via the gcube workload's service URL or port access URL.
Step 11 — Review and Edit Configuration File
Use the command below to write the /root/.openclaw/openclaw.json configuration file.
Warning
Make sure to replace <YOUR_GATEWAY_TOKEN>, <YOUR_TELEGRAM_BOT_TOKEN>, and <SERVICE_URL> with your actual values.
{
  "agents": {
    "defaults": {
      "workspace": "/root/.openclaw/workspace",
      "model": {
        "primary": "ollama/gemma4:e4b"
      },
      "models": {
        "ollama/gemma4:e4b": {}
      }
    }
  },
  "gateway": {
    "mode": "local",
    "auth": {
      "mode": "token",
      "token": "<YOUR_GATEWAY_TOKEN>"
    },
    "port": 18789,
    "bind": "lan",
    "controlUi": {
      "allowInsecureAuth": true,
      "allowedOrigins": [
        "http://<SERVICE_URL>:18789"
      ],
      "enabled": true,
      "dangerouslyDisableDeviceAuth": true
    },
    "tailscale": {
      "mode": "off",
      "resetOnExit": false
    },
    "nodes": {
      "denyCommands": [
        "camera.snap",
        "camera.clip",
        "screen.record",
        "contacts.add",
        "calendar.add",
        "reminders.add",
        "sms.send",
        "sms.search"
      ]
    },
    "tls": {
      "enabled": false,
      "autoGenerate": false
    }
  },
  "session": {
    "dmScope": "per-channel-peer"
  },
  "tools": {
    "profile": "coding",
    "web": {
      "search": {
        "provider": "ollama",
        "enabled": true
      }
    }
  },
  "plugins": {
    "entries": {
      "ollama": {
        "enabled": true
      },
      "telegram": {
        "enabled": true
      }
    }
  },
  "models": {
    "mode": "merge",
    "providers": {
      "ollama": {
        "baseUrl": "http://127.0.0.1:11434",
        "api": "ollama",
        "apiKey": "OLLAMA_API_KEY",
        "models": [
          {
            "id": "gemma4",
            "name": "gemma4",
            "reasoning": false,
            "input": ["text"],
            "cost": { "input": 0, "output": 0, "cacheRead": 0, "cacheWrite": 0 },
            "contextWindow": 128000,
            "maxTokens": 8192,
            "compat": { "supportsUsageInStreaming": true }
          },
          {
            "id": "gemma4:e4b",
            "name": "gemma4:e4b",
            "reasoning": true,
            "input": ["text", "image"],
            "cost": { "input": 0, "output": 0, "cacheRead": 0, "cacheWrite": 0 },
            "contextWindow": 131072,
            "maxTokens": 8192,
            "compat": {
              "supportsTools": true,
              "supportsUsageInStreaming": true
            }
          }
        ]
      }
    }
  },
  "auth": {
    "profiles": {
      "ollama:default": {
        "provider": "ollama",
        "mode": "api_key"
      }
    }
  },
  "channels": {
    "telegram": {
      "enabled": true,
      "groups": {
        "*": { "requireMention": true }
      },
      "botToken": "<YOUR_TELEGRAM_BOT_TOKEN>"
    }
  },
  "wizard": {
    "lastRunAt": "2026-05-03T15:32:24.907Z",
    "lastRunVersion": "2026.5.2",
    "lastRunCommand": "onboard",
    "lastRunMode": "local"
  },
  "meta": {
    "lastTouchedVersion": "2026.5.2",
    "lastTouchedAt": "2026-05-03T15:32:25.021Z"
  }
}
Step 12 — Configure and Use Web Dashboard
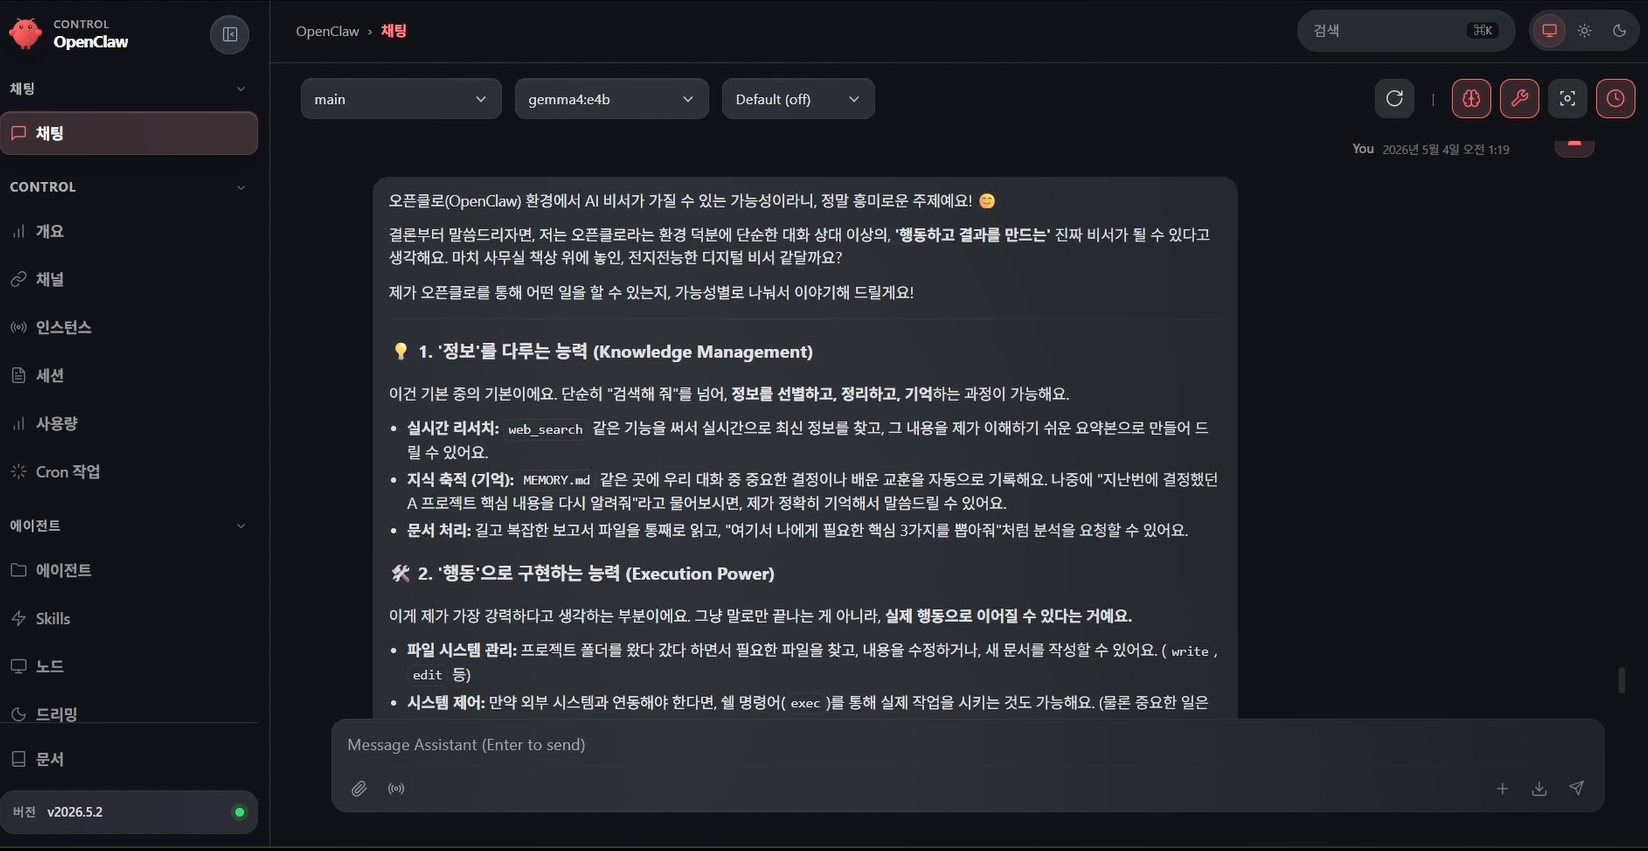
Access the web dashboard via the gcube workload's service URL or port access URL.
From the OpenClaw web dashboard, you can review and update settings, and use OpenClaw directly through connected features.
Step 13 — Troubleshooting
| Issue | Cause | Solution |
|---|---|---|
| Cannot access web dashboard | Gateway bind setting not configured for external access |
Set bind to lan and port to 18789 |
| Control UI access blocked | controlUi.allowedOrigins does not match service URL |
Add http://<SERVICE_URL>:18789 to allowedOrigins |
| OpenClaw command not working | npm global install path issue | Re-run npm i -g openclaw and check PATH |
| Plugin error | Required npm package missing | Install the relevant package globally |
| Model fails to run | Ollama model not downloaded | Run ollama run gemma4:e4b |
| Pairing fails | Request ID or code mismatch | Re-check the latest pairing request |
Note
OpenClaw is frequently updated, so commands, configuration fields, and UI may change. If something differs from this guide, check the official OpenClaw documentation first.
Step 14 — Security Notes
Warning
- Do not expose the Gateway Token publicly.
- Do not enter the Telegram Bot Token directly in documents.
- Remove the Pairing Code and Request ID from documents after use.
- Only enter
http://<SERVICE_URL>:18789inallowedOrigins. allowInsecureAuth: true,dangerouslyDisableDeviceAuth: true, andtls.enabled: falsesettings are recommended for test environments only.